CanFace CF1/CF2: Quickstart Guide

This guide will introduce you to the basic of interacting with CanFace CF1/CF2, we’ll cover the following:
- How to configure CanFace using the CLI interface
- How to connect to a CAN network using SLCAN
- How to use CF2 as Blackmagic Debug Probe
- How to update the firmware
The guide assumes you have access to a GNU/Linux based OS – Ubuntu in my case.
Note
Until 2025, CanFace CF1 was sold as “Babel” and CanFace CF2 as “BabelBabel”, these names have been retired now.
Difference between CF1 and CF2?
Before we start, it would be good to discuss the difference between CanFace CF1 and CF2.
| Functionality | CanFace CF1 | CanFace CF2 |
|---|---|---|
| CAN | ✓ | ✓ |
| # of CAN interfaces | 1 | 2 |
| Blackmagic Debug Probe | X | ✓ |
Short story: CF2 is like 2x CF1 and also has a Blackmagic Debug Probe (later more about this).
Neither support CAN FD (stay tuned for CanFace CF3).
Configuring CanFace
Let’s start by just connecting our device to a USB port and see if it shows up correctly using lsusb.
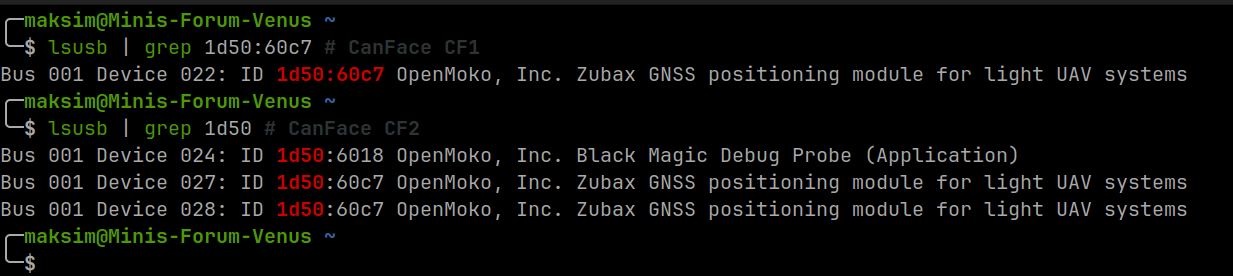
Warning
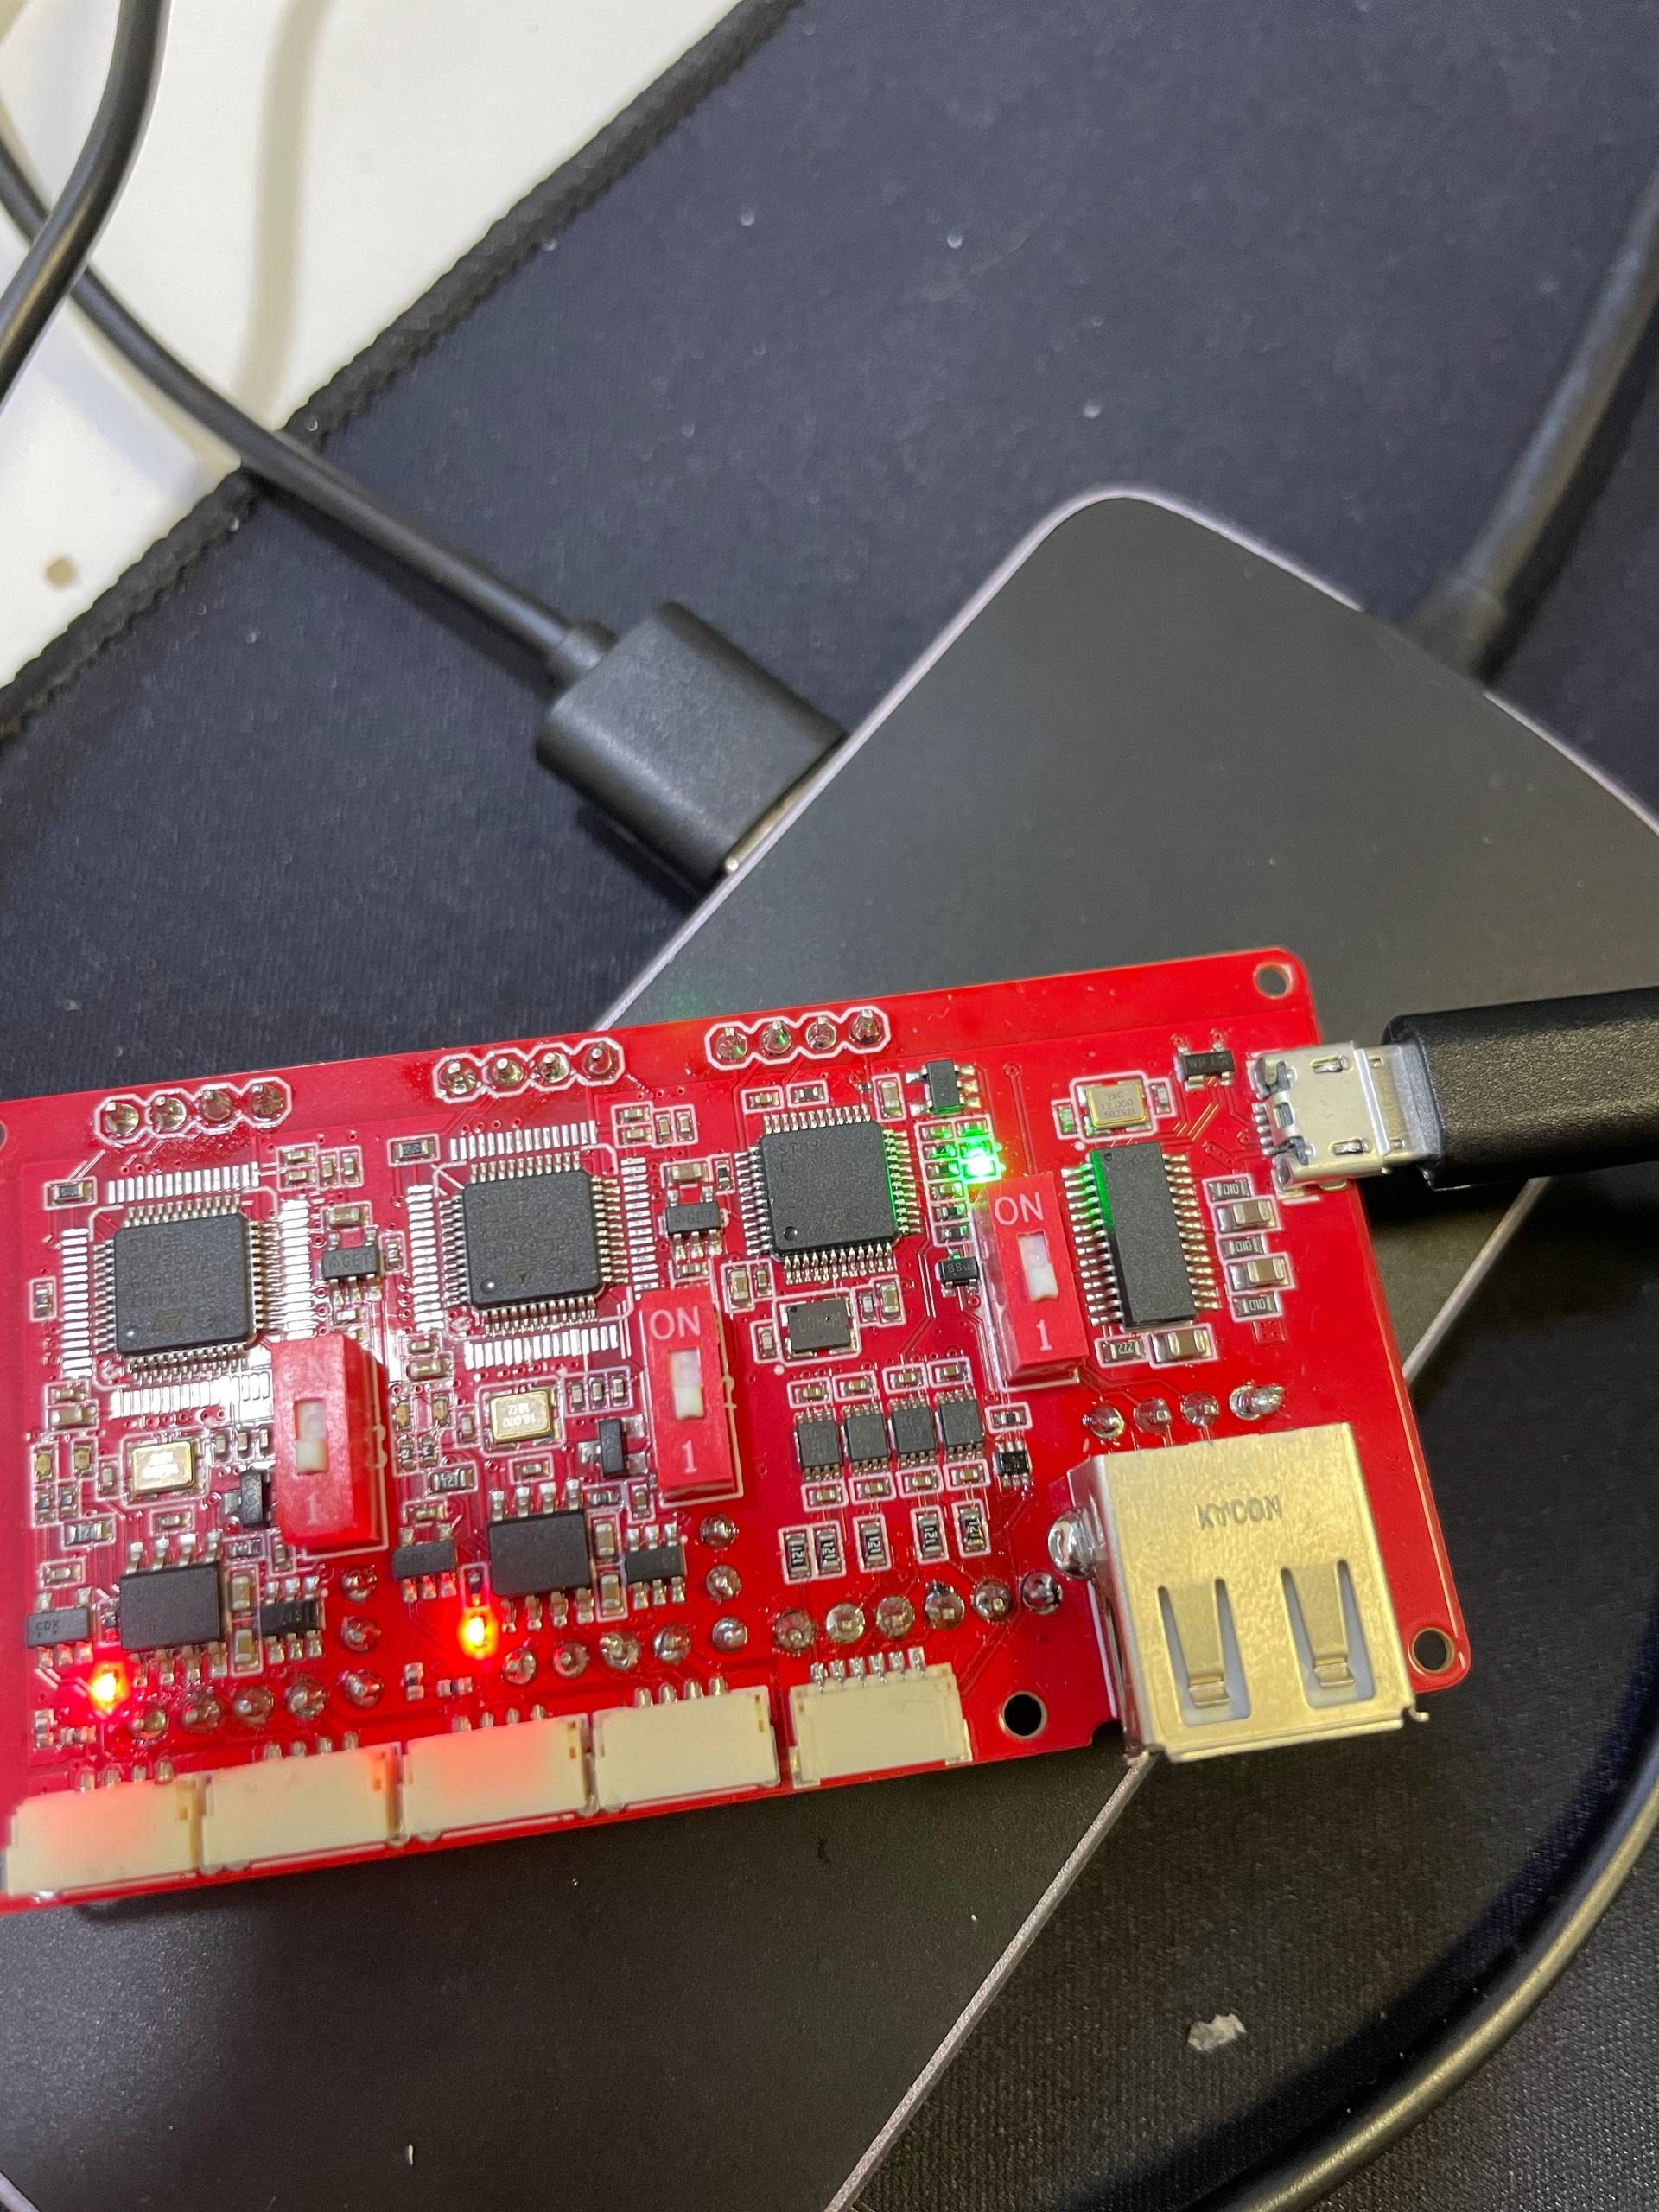
All USB interfaces are equal, but some are more equal than others. For our purposes this means that if CanFace doesn’t show up inlsusb, you should try connecting directly to a different USB port (also refrain from using dongles, these can cause issues). On CF2 there’s a way to diagnose this issue visually: The green LED should be lit up and there should be no red LED blinking next to it.
Note:
- Green LED, no blinking red LED → USB interface OK
- All switches are down
CLI interface
Both CF1 and CF2 have CLI interface that can be used to configure some settings. To connect to it, we’ll need to use the serial interface exposed under ls /dev/serial/by-id/.

Note here again: CF1 exposes 1 single CAN interface, while CF2 exposes 2 (in addition to 2 serial interfaces related to Blackmagic).
To connect to the CLI interface I’ll be using picocom, which can be installed using sudo apt install picocom.
After connecting using picocom, enter cfg list to see a list of configurations:
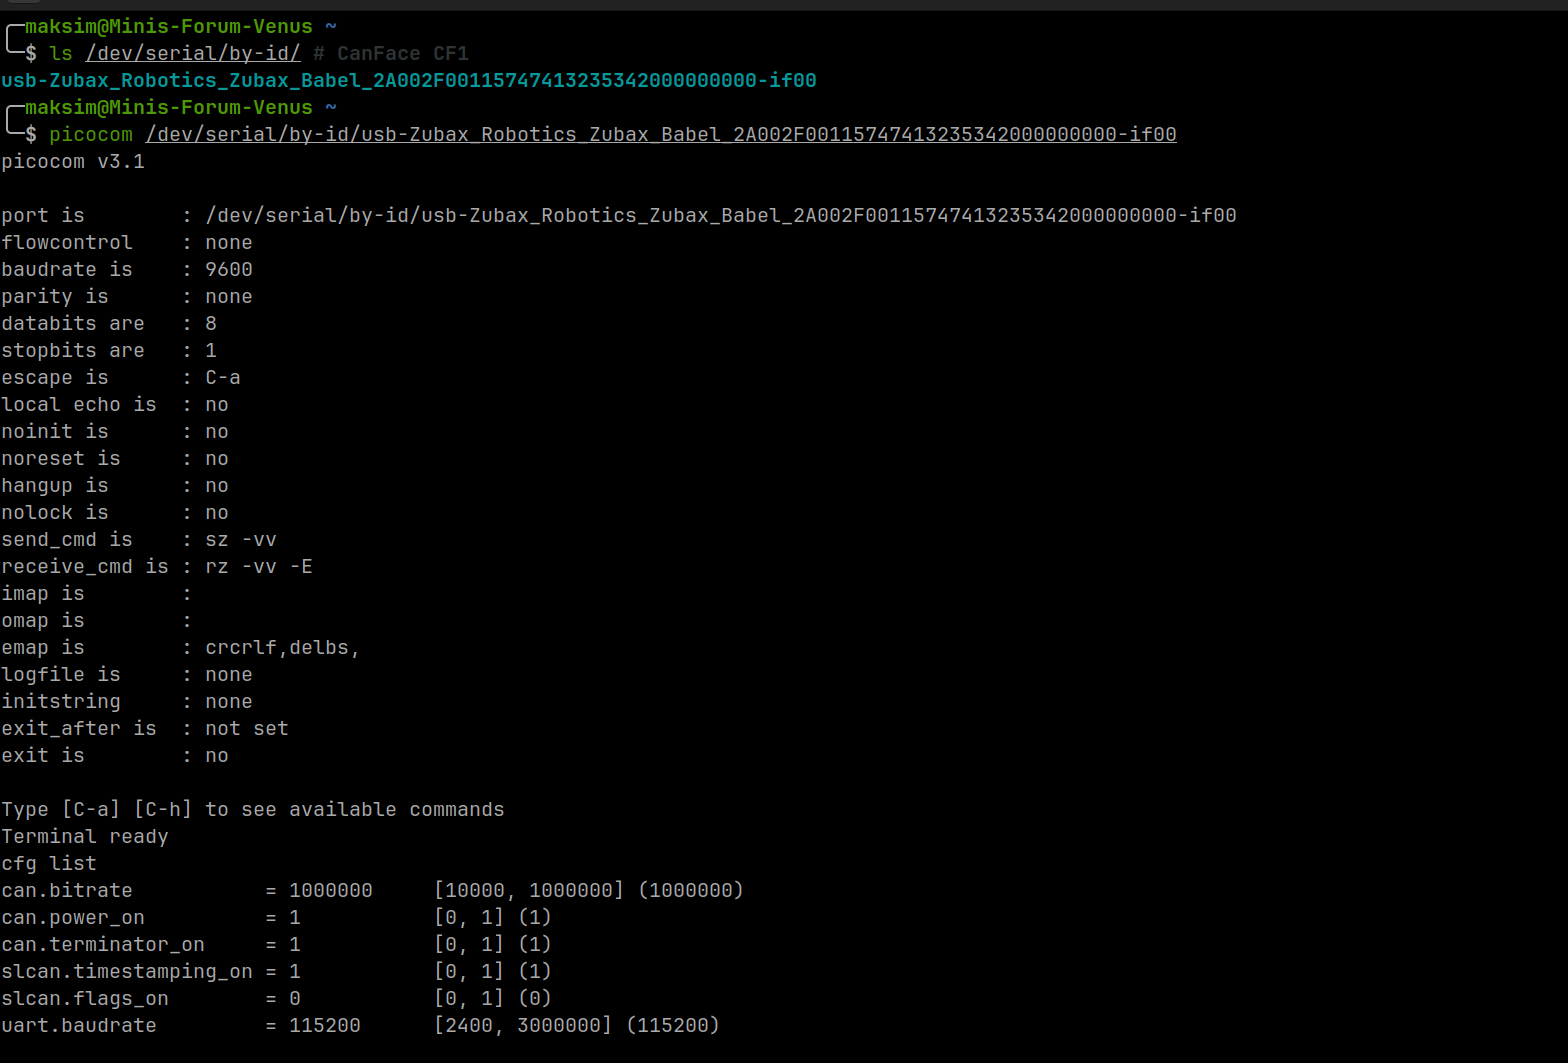
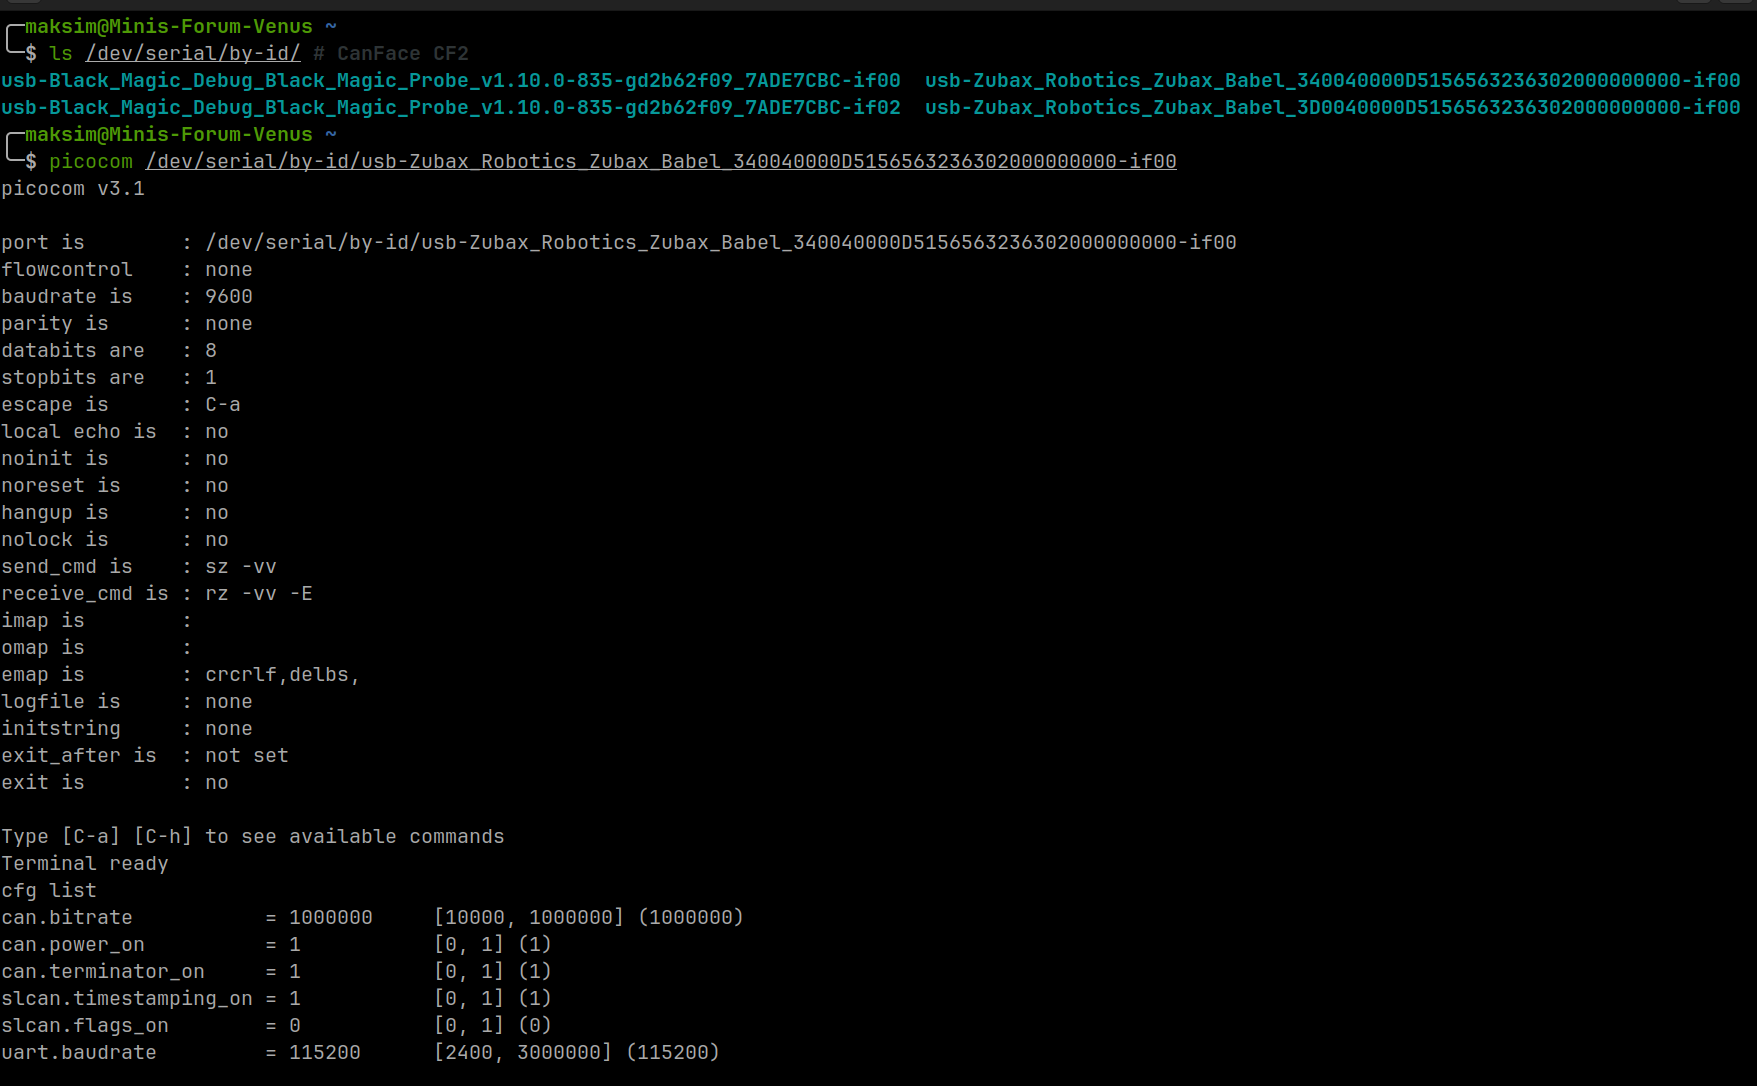
Note that since CF2 has 2 serial interfaces, this also means that we can configure the 2 CAN interfaces differently!
For my purposes, the only configuration parameter from the list I’ve had to set from time to time (cfg set <name> <value>) is can.power_on, this controls whether the CAN interface will provide power (as the name implies). This can be interesting if you’re using the CanFace to power some device that’s connected.
In addition to cfg list, there’s also the following commands that can be used in CLI:
zubax_id: reports information identifying this particular productstat: reports immediate state information of the CAN interface (error counters and so on)bootloader: reboots the device into bootloader modereboot: rebootsgpio: controls GPIO pins (sometimes useful for development purposes to have a GPIO pin you can toggle)
Connecting to CAN
The CAN interface works based on the SLCAN protocol, to simplify we’ll be using a script.
wget https://gist.github.com/pavel-kirienko/32e395683e8b7f49e71413aebf5e1a89/raw/f08e426e6c963a5d68868084cd2fab2a469bf76f/setup_slcan
chmod +x setup_slcan # Make it executable
sudo setup_slcan --speed-code 8 --remove-all -r /dev/serial/by-id/usb-*Zubax*Babel* # 8 means 1 Mbps, use --help to see other bitrates

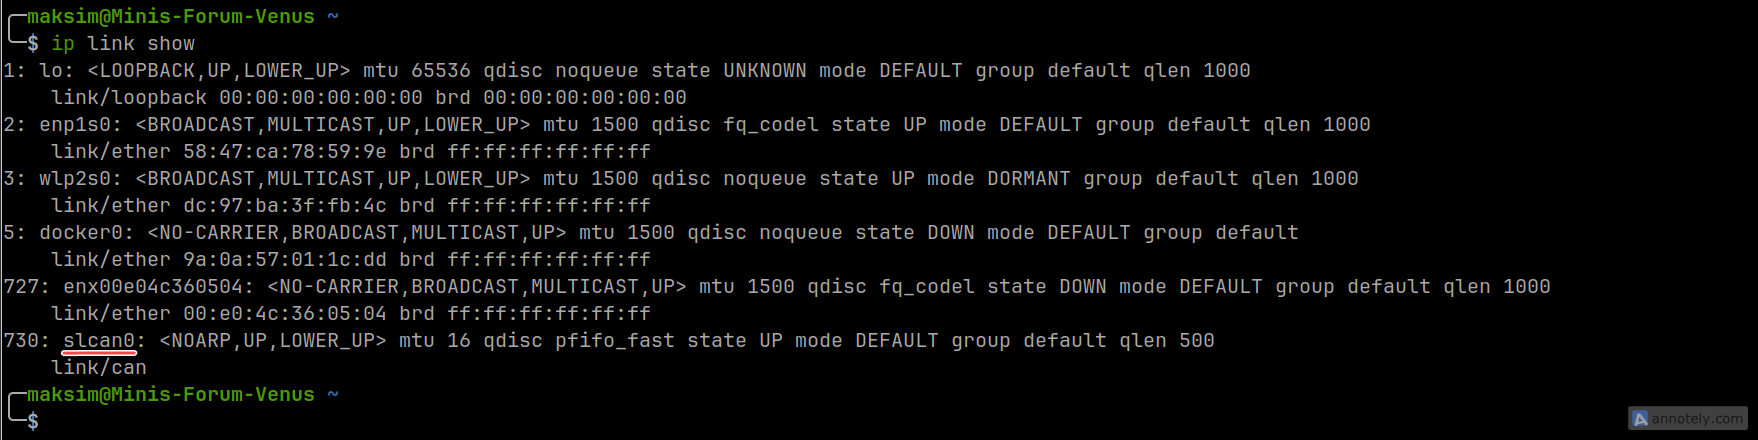
To check if the interface has been set up correctly, use ip link show:
Now we can use candump to display frames from the CAN network:

Note: I’ve connected a FluxGrip so here the Heartbeat which is being displayed.
If you want to use Cyphal, now you can by referring the slcan0 socketcan which we’ve set up now, I will refer you to the FluxGrip Quickstart Guide here.
Blackmagic Debug Probe
TODO
Updating firmware
TODO


