
FluxGrip: Integration with ArduPilot

FluxGrip with standard ArduPilot
This post shows how to use FluxGrip with standard ArduCopter firmware and ArduPilot’s DroneCAN virtual-relay support. No custom firmware or Lua script is required.
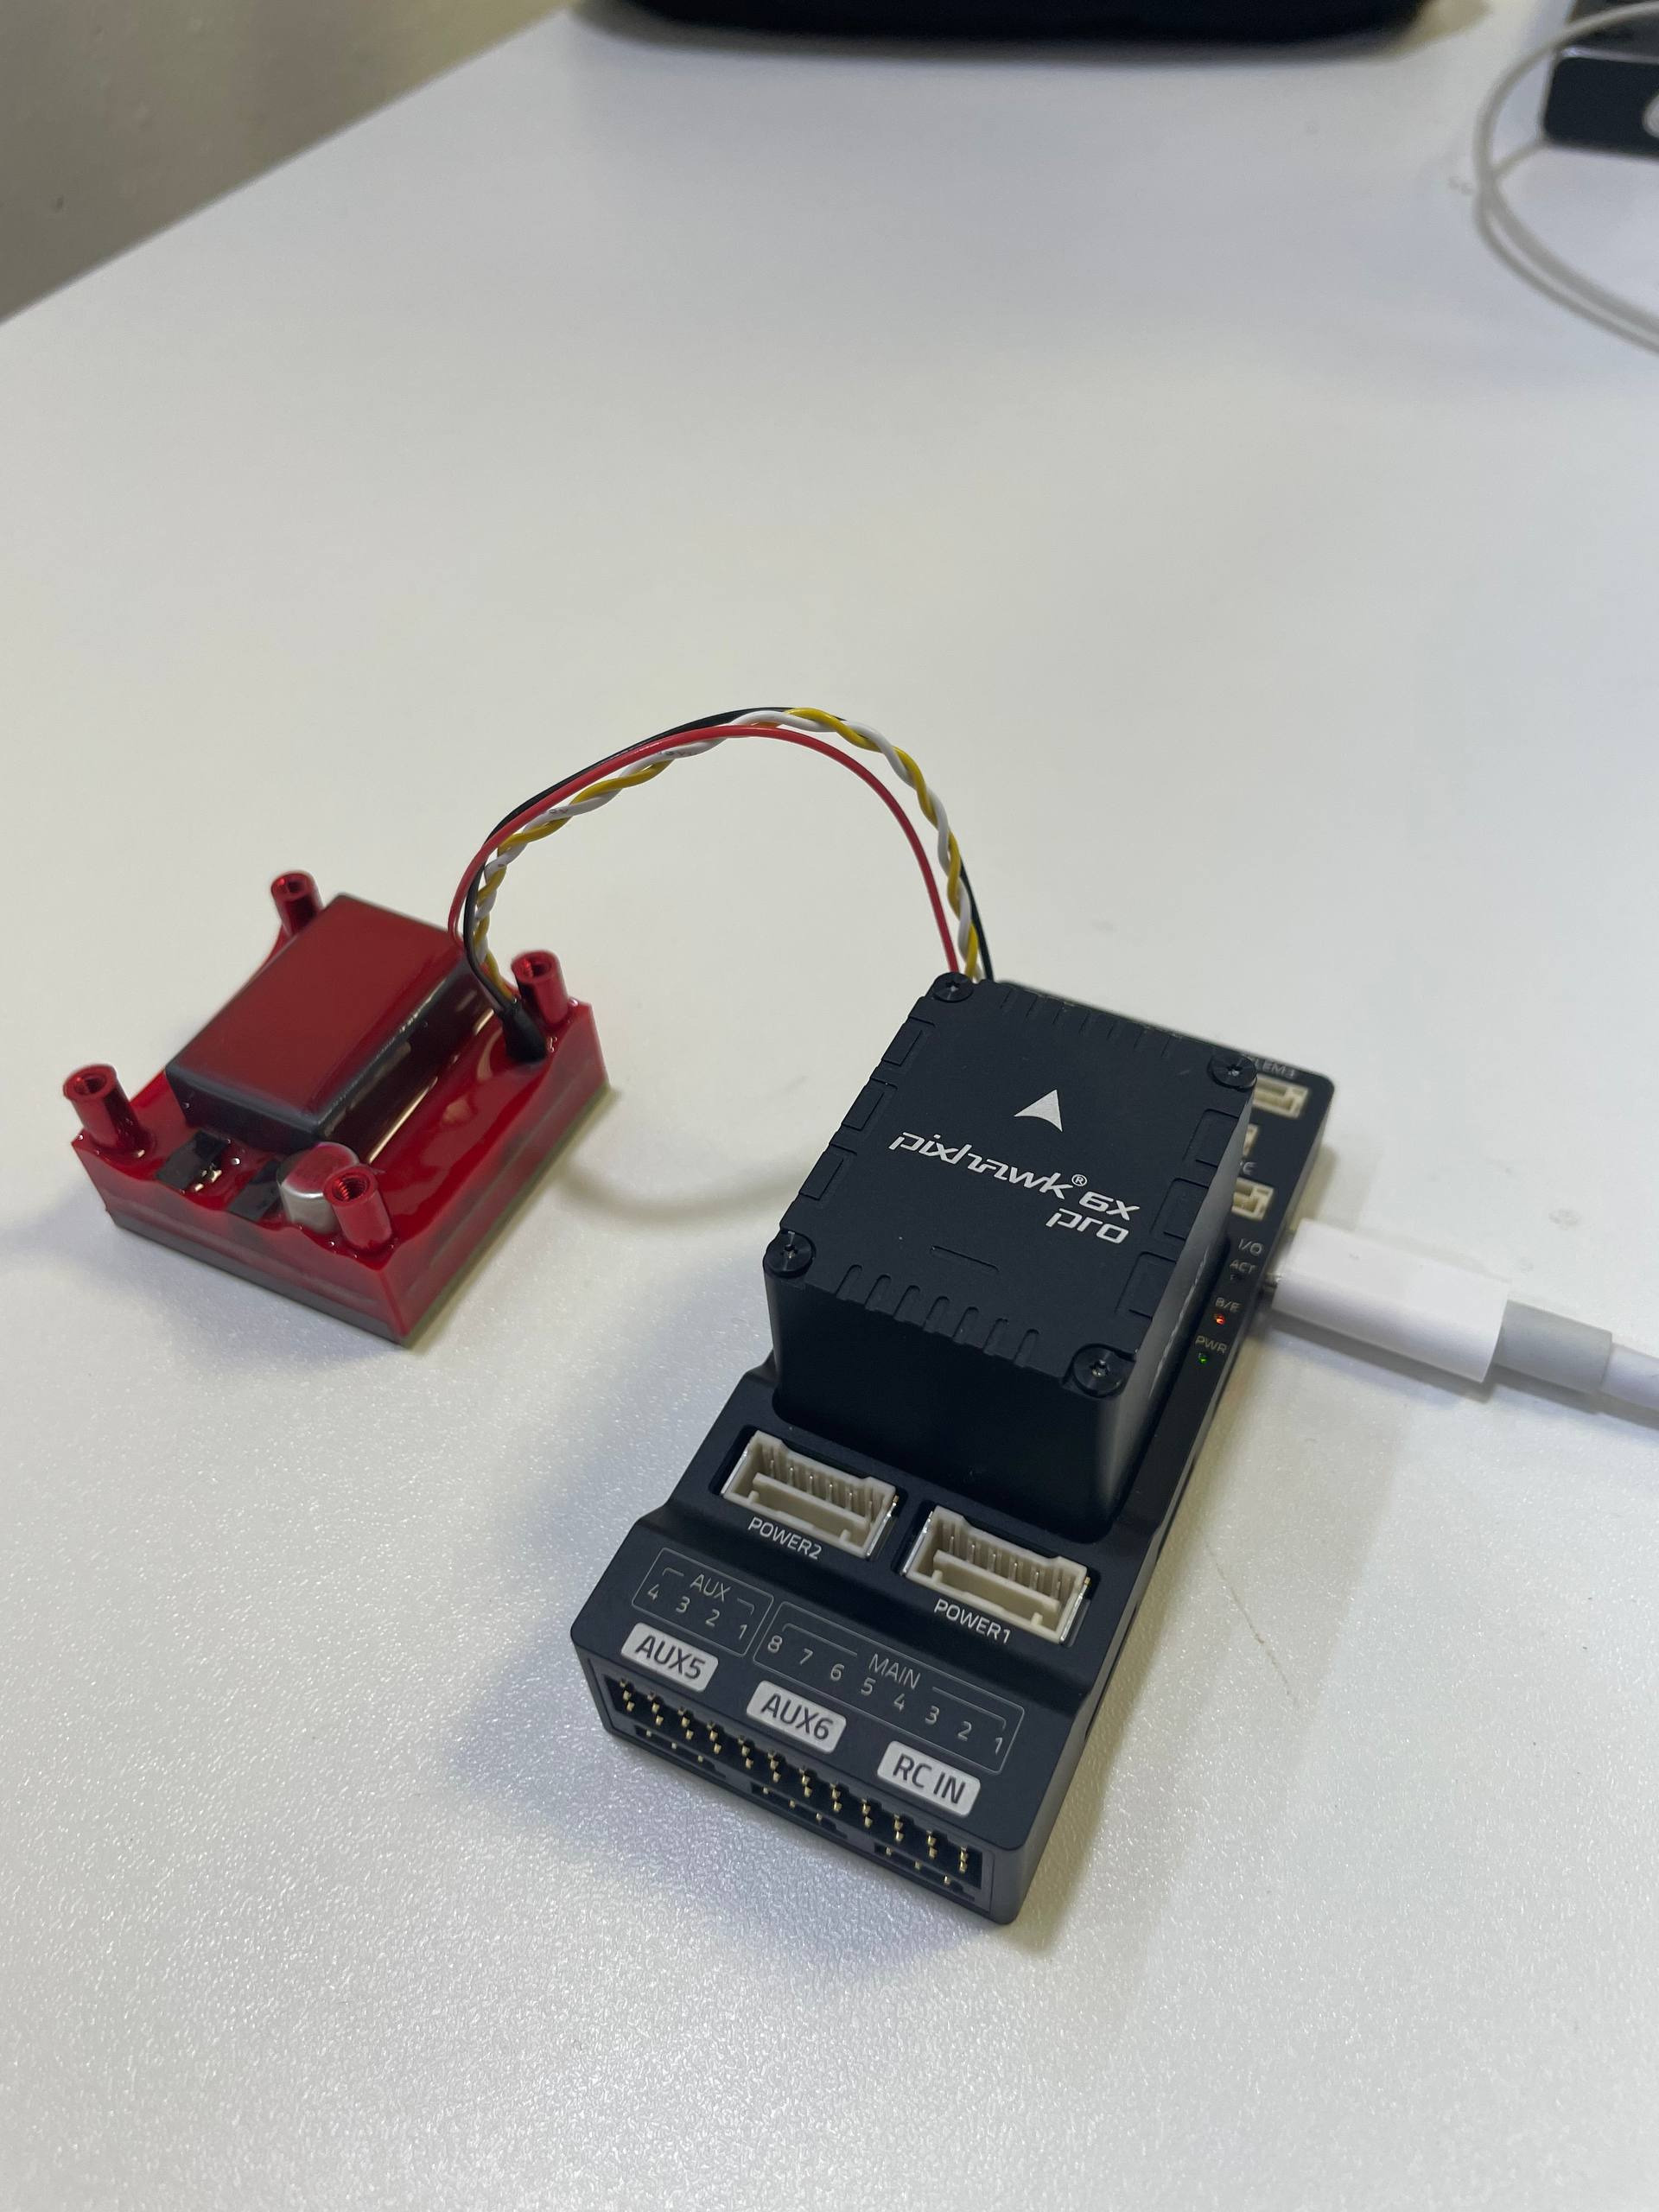
Tested with Holybro Pixhawk 6X Pro and FluxGrip running 502e1f5 version of the firmware.
1. Setup
- Install Mission Planner.
- Connect the flight controller to the Windows PC over USB.
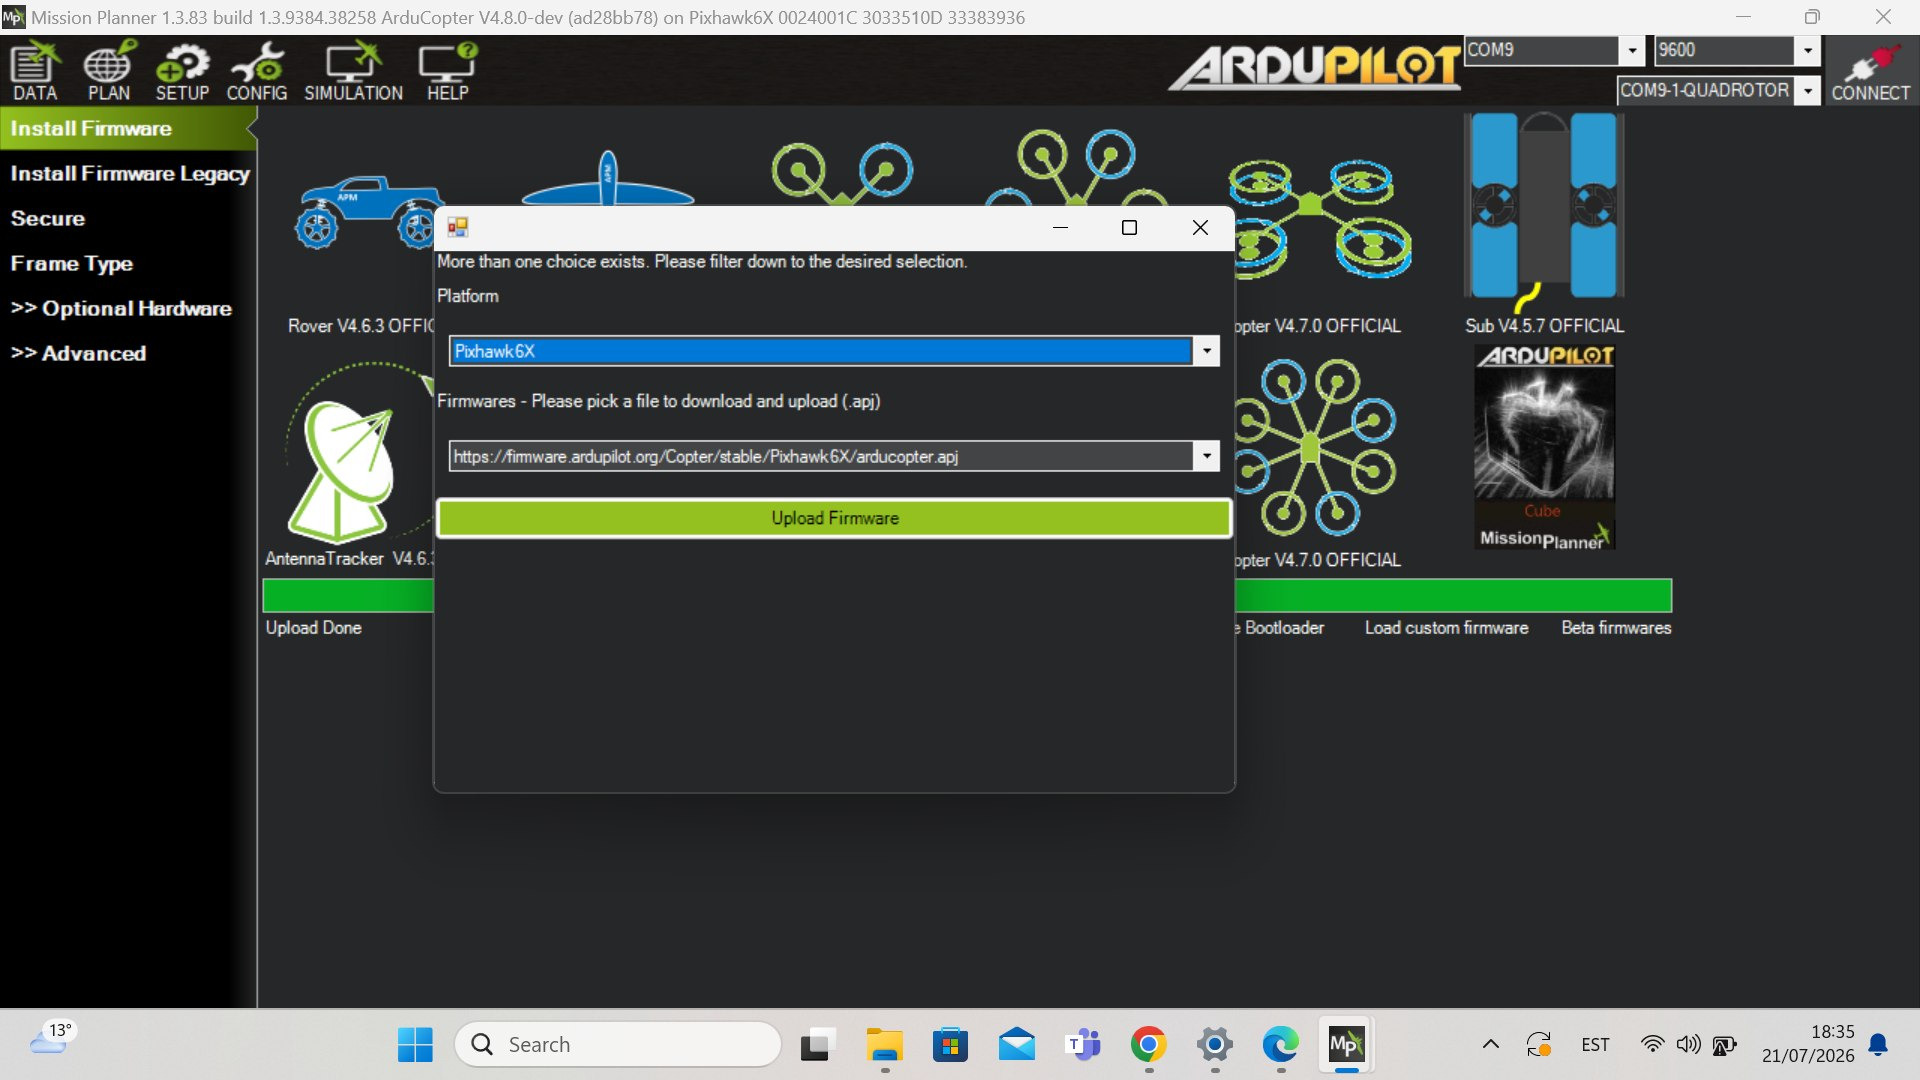
- Open Setup → Install Firmware
- Install the current stable ArduCopter firmware for your flight controller. At the time of writing this is v4.7.0, we’ll be using the quadcopter version.
- Reconnect the flight controller after flashing (reboot).
2. Connect FluxGrip
Connect FluxGrip to CAN1 on the flight controller. It is best to provide a separate power supply to FluxGrip to speed up switching and reduce load on the flight controller’s power rail — FluxGrip can briefly consume large current during switching (details in the docs).
3. Configure ArduPilot
In Mission Planner, open Config → Full Parameter List, connect and then press Reset to Default:
Reboot and set the following values:
CAN_P1_DRIVER   1 # Press Write Params and Refresh, the next 2 won't appear otherwise
CAN_P1_BITRATE  1000000
CAN_D1_PROTOCOL 1
This creates the following mapping:
Physical CAN1 → virtual CAN driver D1 → DroneCAN
Click Write Params, disconnect flight controller, and reconnect.
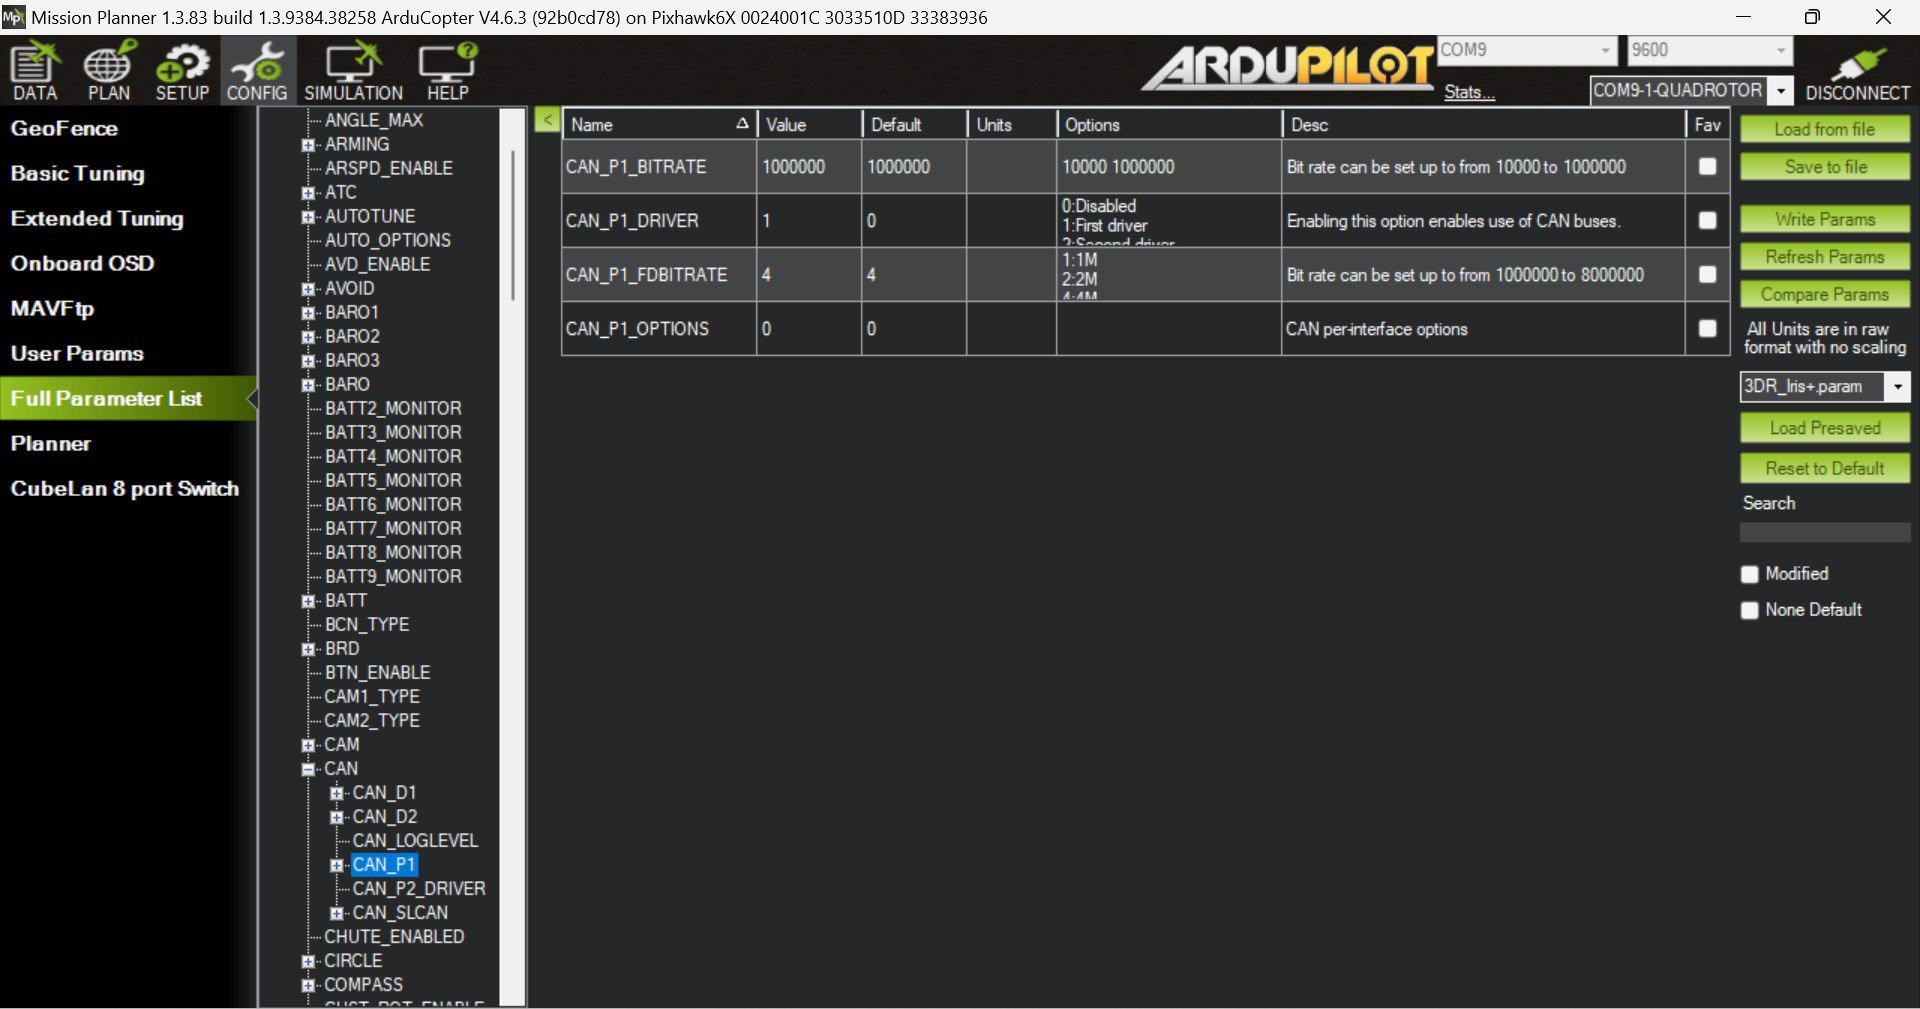
After rebooting, refresh the complete parameter list (Refresh Params). The CAN_D1_UC_ parameters should now appear. Set:
CAN_D1_UC_NODE   10
CAN_D1_UC_RLY_RT 10
CAN_D1_UC_NODE is the flight controller’s DroneCAN node ID.
Write the parameters and reboot again.
4. Verify FluxGrip communication
Once connected CAN LED on FluxGrip should blink as follows:
- 1 solid on the left (connection is up)
- 1 blinking (connection is active)
Go to
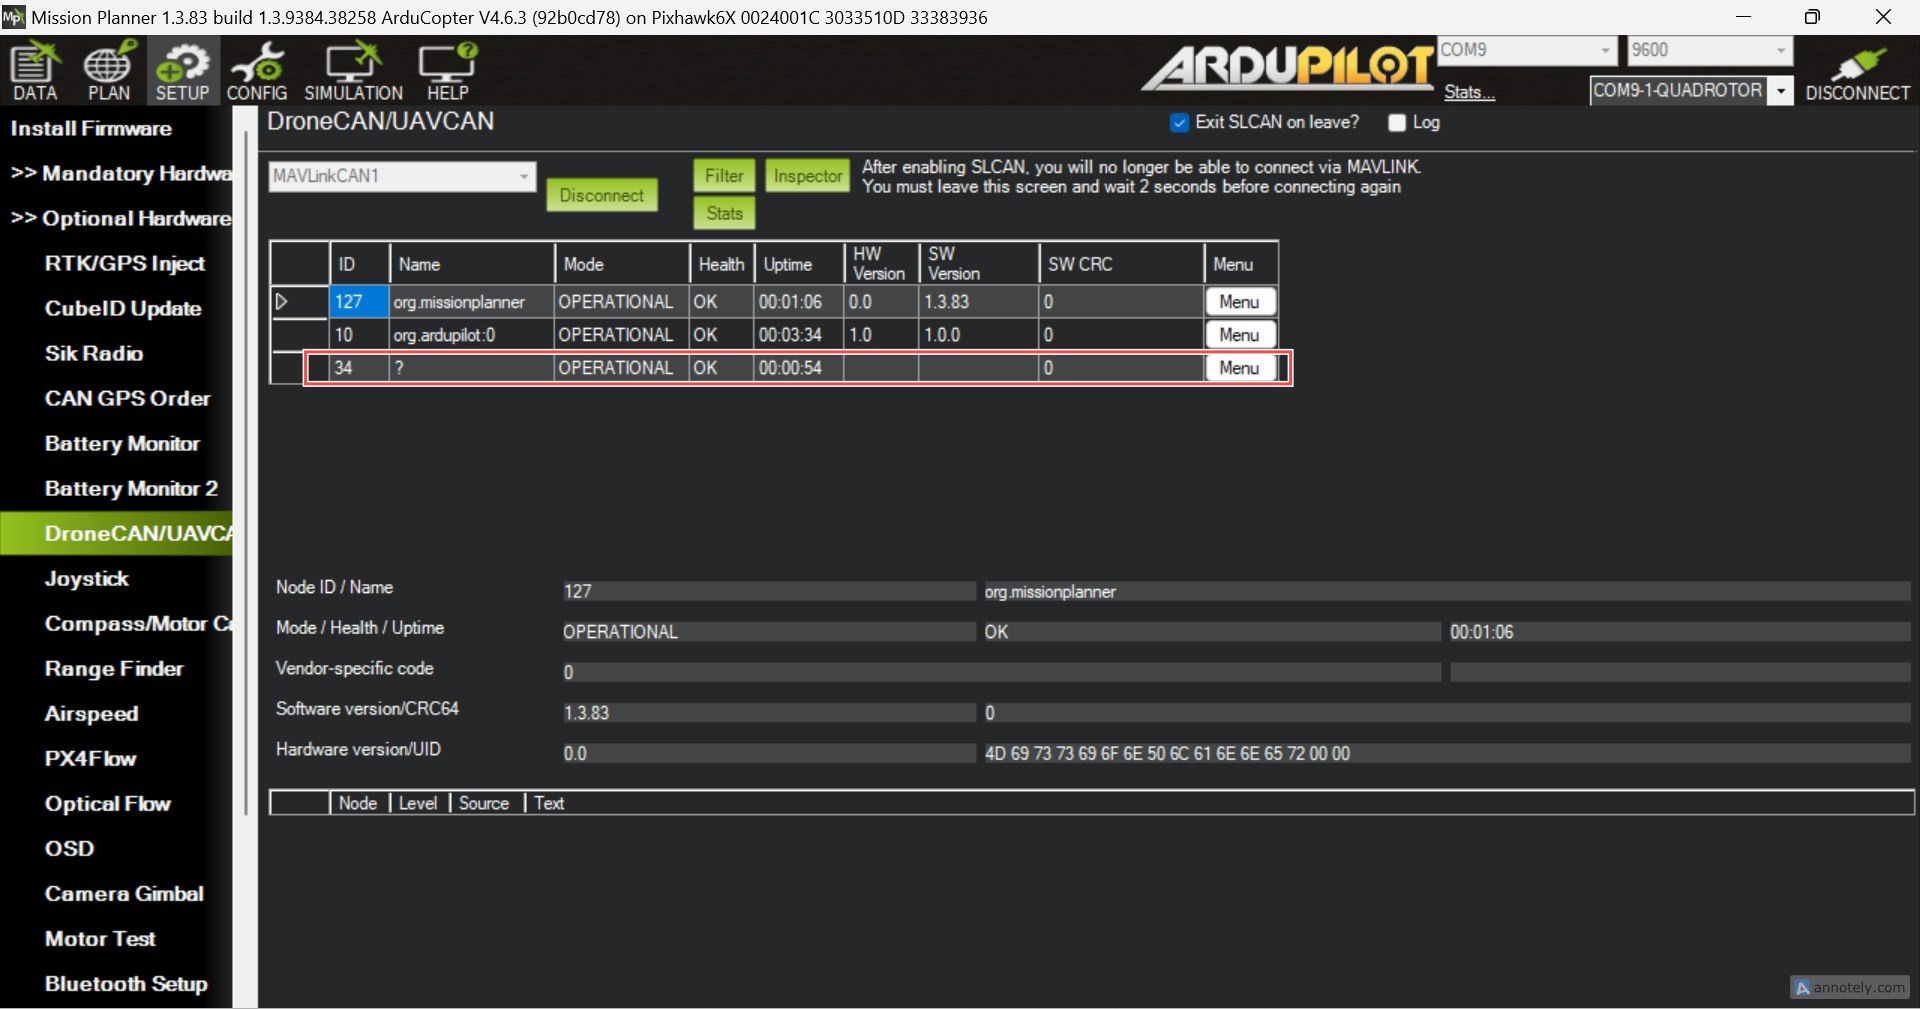
Open Setup → Optional Hardware → DroneCAN/UAVCAN page, select MAVLinkCAN1 and Connect.
NOTE
If FluxGrip doesn’t show up on DroneCAN/UAVCAN page, please make sure that you’ve set the parameters correctly.
If you’re using Pixhawk 6X Pro: If Missionlanner’s Data → Messages reports “Config error: Failed to update IO firmware”, ArduPilot may have stopped before initializing CAN. To bypass this issue you can set
BRD_IO_ENABLE=2, but an unresolved IO-MCU problem should be accepted for flight.
5. Configure FluxGrip as a DroneCAN relay
By default, FluxGrip is configured with a hardpoint ID of zero, set:
RELAY1_FUNCTION 1 # Press Write Params and Refresh, the next 3 won't appear otherwise
RELAY1_PIN      1000 # Select Hardpoint ID 0
RELAY1_DEFAULT  2 # NoChange
RELAY1_INVERTED 0
GRIP_ENABLE     0
Click Write Params and reboot.
Note
FluxGrip does not currently allow to configure its DroneCAN hardpoint ID, if you need this functionality please reach out to maksim.drachov@zubax.com
6. Control the magnet from Mission Planner
The vehicle can remain disarmed.
- Connect (top-right)
- Open Data → Servo/Relay.
- Select relay number 0.
- Use the relay controls:
Relay 0 High/On → grip/hold
Relay 0 Low/Off → release
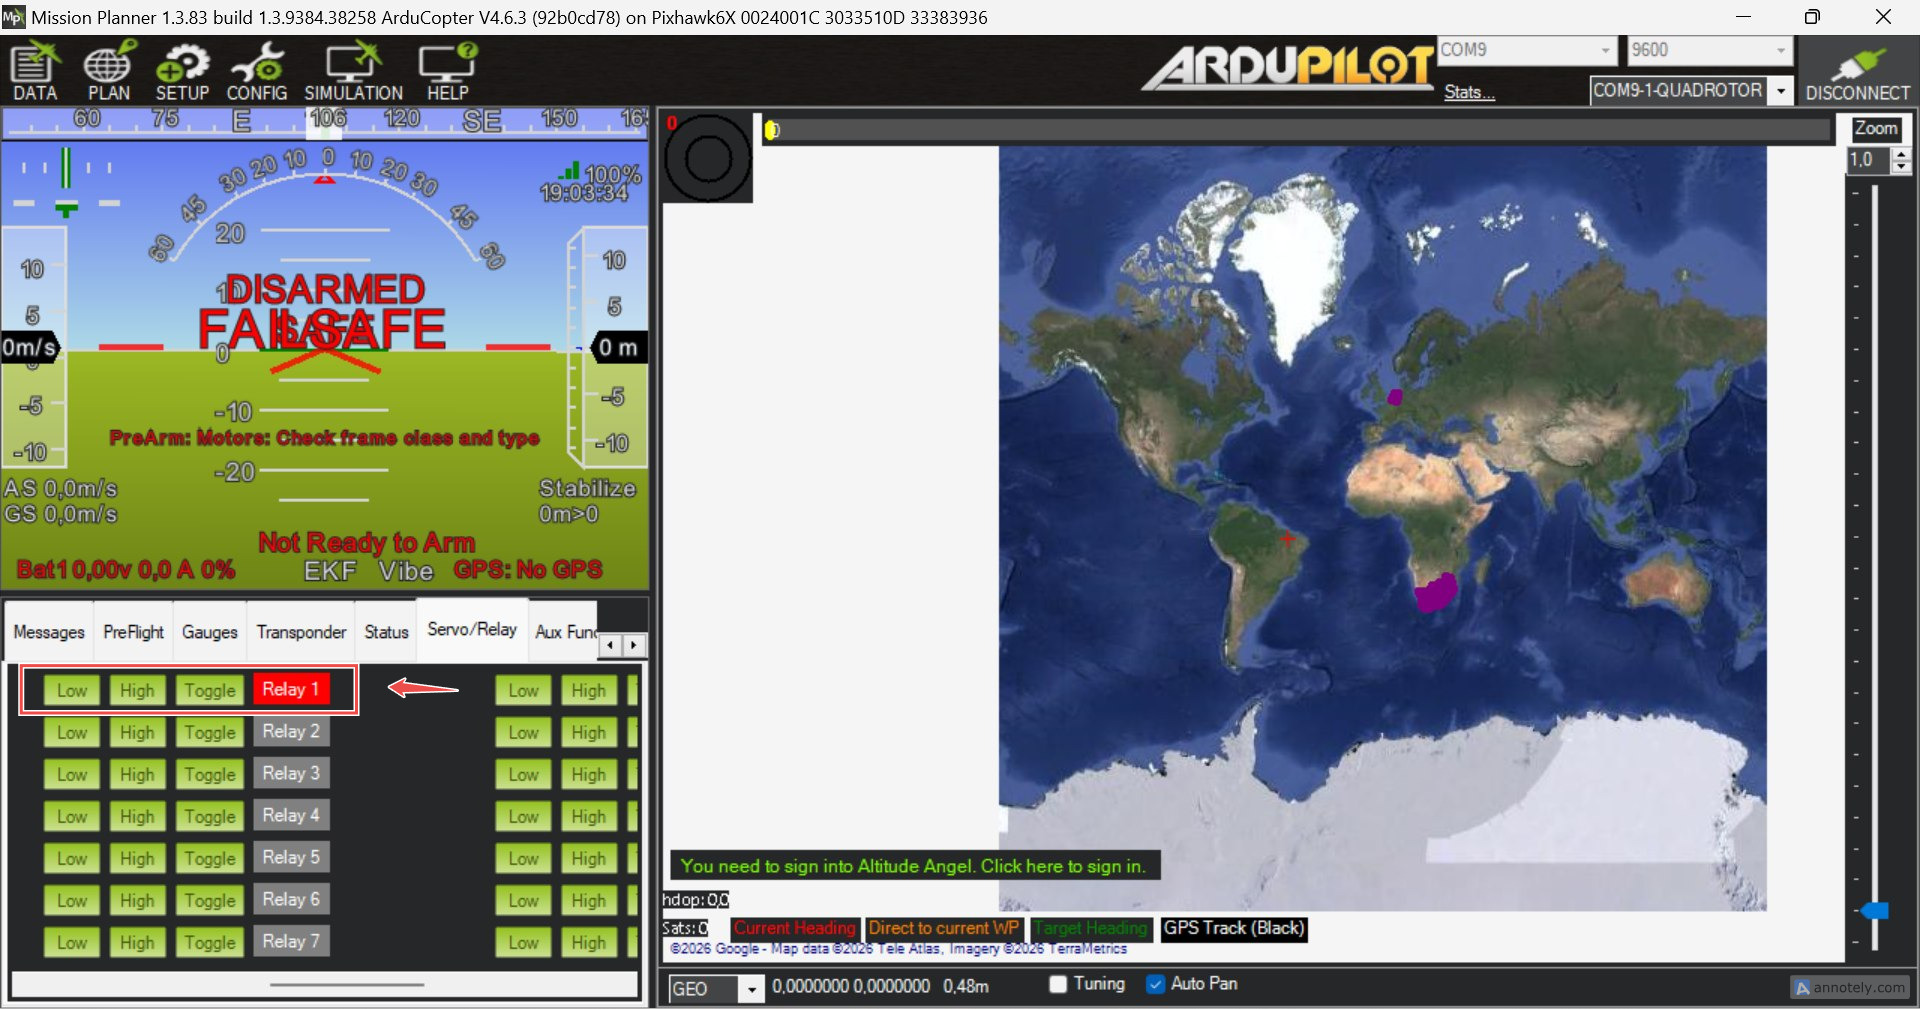
Mission planner calls the first ArduPilot relay “relay 0”, even though its parameters are named RELAY1_.
Magnet LED patterns
- Magnet is in Detect state (Unknown): the default state upon turning on
- Magnet is ON
- Magnet is OFF
- Magnet is “Turning On”
- Magnet is “Turning Off”
If the Magnet LED is blinking rapidly, the magnet has failed to magnetize, reach out to Zubax.



