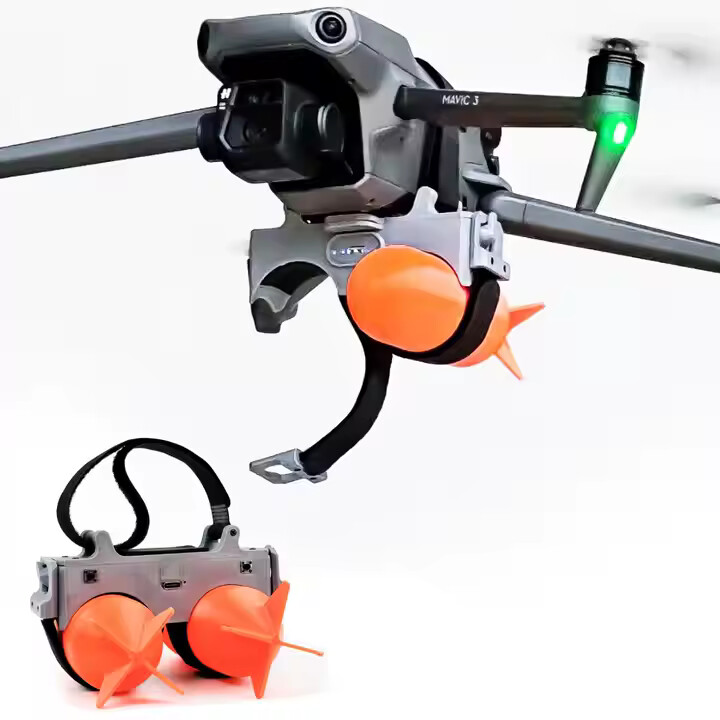
MagMavic: magnetic payload attachment for DJI Mavic 3


DJI Mavic 3 is an extremely capable drone system, however it doesn’t offer any built-in way to attach payloads like extra cameras or sensors (or plastic torpedoes, which suspiciously look a lot like real explosives). In this blog I will walk you through the process of creating a magnetic attachment module using just a 3D printer, one FluxGrip (an electro-permanent magnet) and an Arduino.
Note: there are other similar solutions on the market, but this is the first one (to my knowledge at least) that relies on magnetic payload attachment. Our solution can potentially have a couple of benefits:
- A more generelizable payload mechanism: all kinds of shapes can be attached (including plastic bottles)
- No moving parts: most (all?) of the payload mechanisms I have found seem to rely on a servo moving a rod, resulting in the release of the payload. In our case, the magnet is demagnetized and the payload becomes detached – there are no moving parts, which means increased durability.
- Magnets are just cooler.
- You can build this one yourself, which also means that you can modify it yourself, in order to suit your particular application. All the software and models can be found on Github and Printables respectively.
Electronics and Software
The first step is connecting all the electronics together and making sure everything works as expected. Start by connecting everything like this:
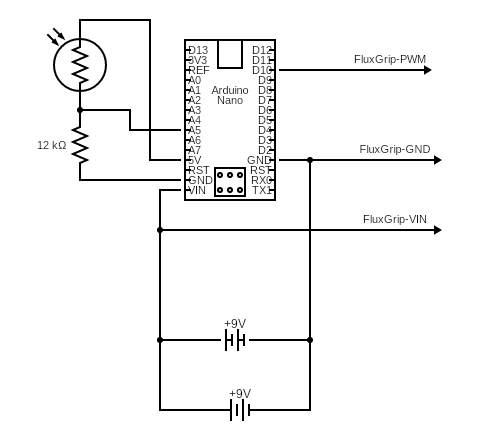
For the Light-Dependent Resistor (LDR, the component in the top-left corner), I’ve used the PDV-P9008. The batteries are the regular 9V kind you can get from any store. Also don’t forget these cables that are used for connecting to the battery terminals.
Connect the Arduino Nano to your desktop (running GNU/Linux) to flash the device as follows:
git clone https://github.com/Zubax/magmavic_software.git
cd ~/magmavic_software
make all # Builds the firmware
make dude # Flashes Arduino Nano
Note: we’re relying on AVR-GCC toolchain, so you’ll need to install it if you don’t have it:
sudo apt-get update
sudo apt-get install gcc-avr binutils-avr avr-libc gdb-avr avrdude
Once you have flashed the Arduino you should see the magnet turn on/off (depending on the amound of light that’s falling on the LDR)
Possible improvements
- Rely on Mavic’s battery instead of attaching 9V batteries, this would mean a significant reduction in weight. (I didn’t do it in this case, cause I wasn’t allowed to modify the Mavic 3 drone that we borrowed.)
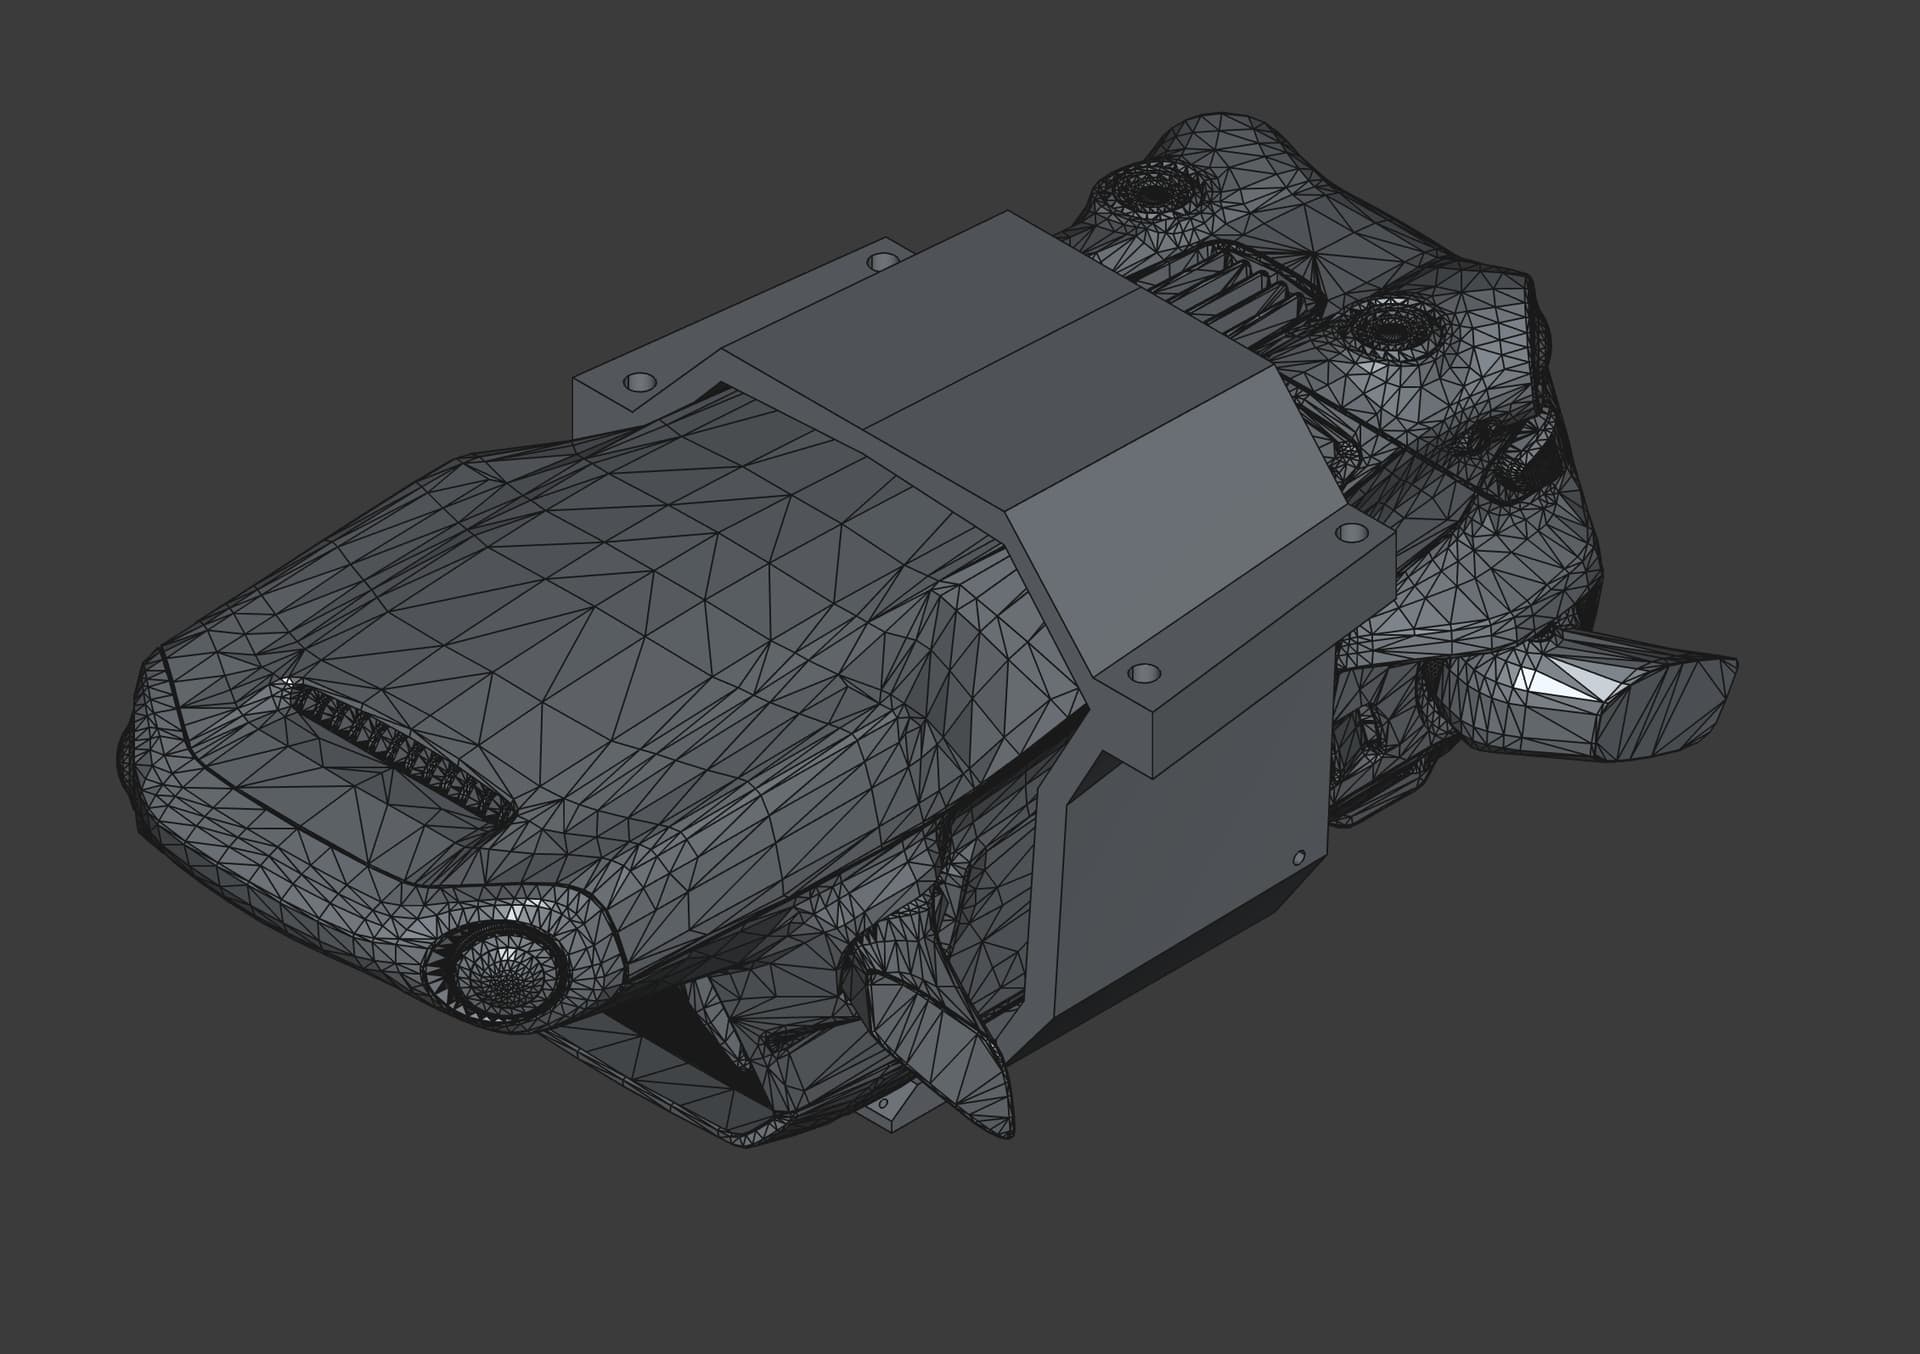
Mechanical design and 3D Printing
Next up is printing the attachment piece itself, I have done the heavy lifting for you, if you want you can edit the holder yourself using FreeCAD:
Mavic_Adaptor_Single_FluxGrip.FCStd (23.5 MB)
If you just want the STL files to print out the pieces, those can be found on Printables. The attachment module itself consists of 2 parts: ‘top’ and ‘bottom’, and there’s a ‘bracket’ which is needed for securing the 2 batteries (1 on each side).
You will need the following screws for assembly:
- Securing the Arduino Nano
- 4x M1.5, length 2mm
- Securing the batteries
- 4x M2.5, length 4mm
- Securing the magnet
- 4x M3, length 20mm
- Securing the ‘top’ to the ‘bottom’ piece
- 4x M2.5, length 15mm
- 4x M2.5 nuts
Possible improvements
- A dual-magnet system, however it might be better to do this when FG10 is ready, since the FG40 is a bit overpowered for the current application.
- Add more waterproofing to protect the electronics from shorting in rainy conditions
- Improve design of battery holders
- Improve cable management
Once you’ve assembled everything it should look something like this:
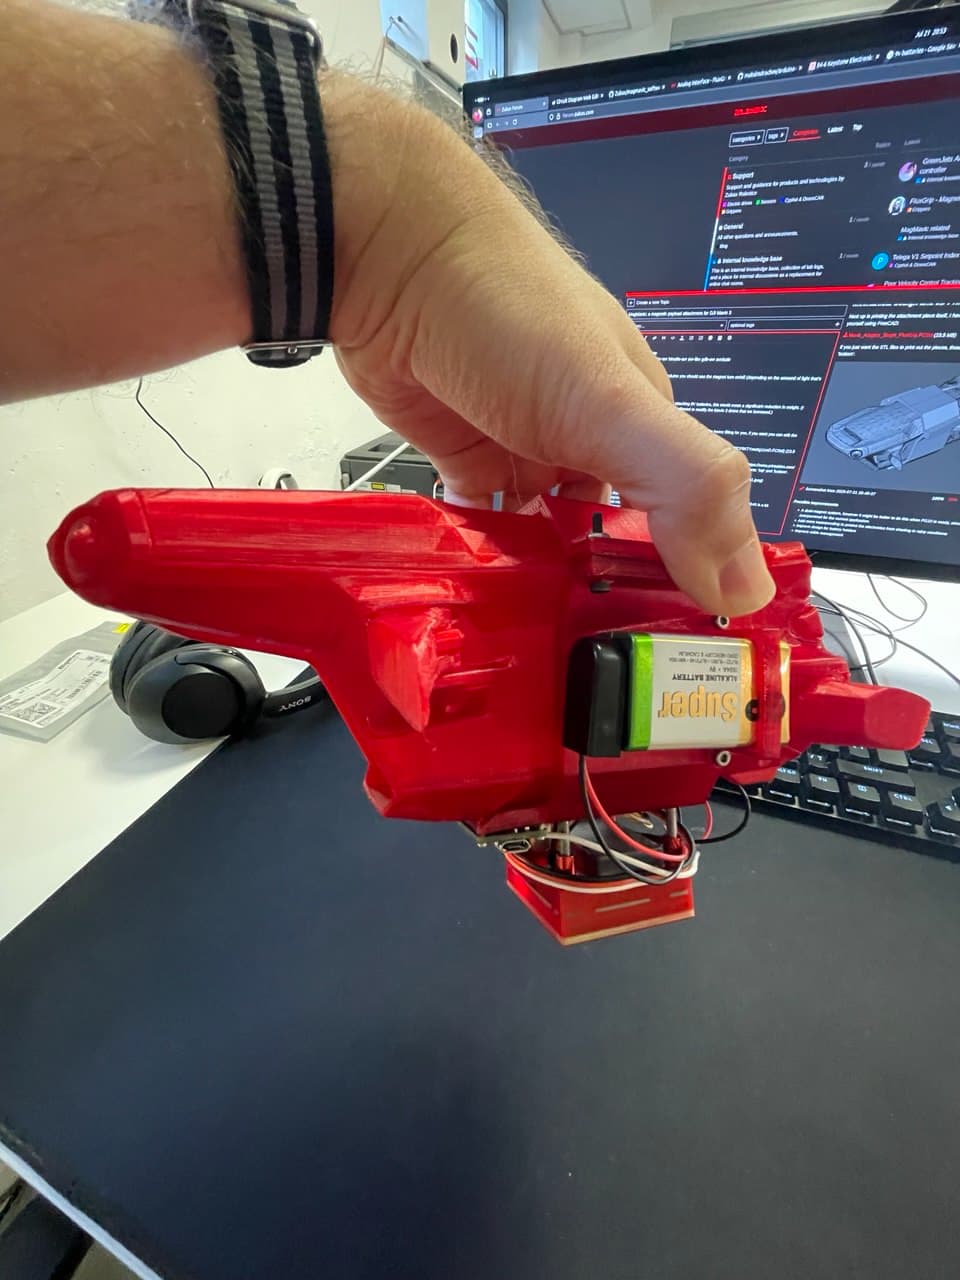
(I’m using a 3D printed model of the Mavic 3, but you get the picture)


